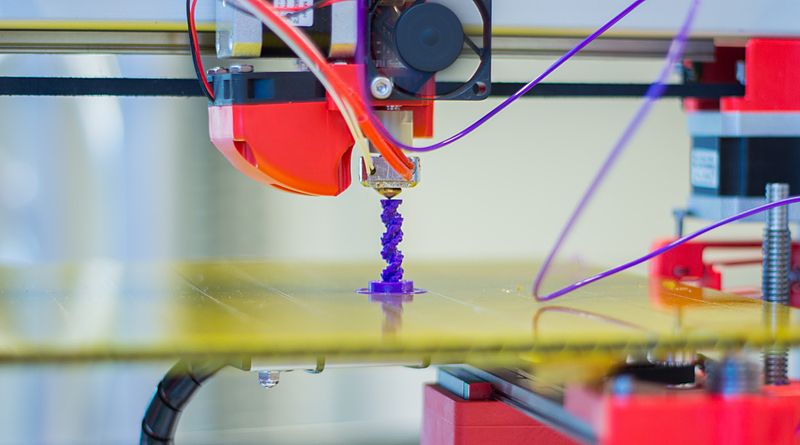
3D printers are all the rage right now. There are people creating small models out of them, building houses out of them, and most recently, a whole car (most of a car) was built using a 3D printer. I've been interested in them for the longest while, but only in the past few years have they become affordable enough to gain traction with the hobbyist crowd, like me. You can pick up a relatively good one for less than £200, and the best thing about that is you can immediately (once you get it up and running, of course), start printing upgrades for the printer which further improves the quality of future prints.
With the huge reduction in price, this now becomes available as a tool for education. Yes, some schools probably already had 3D printers. However, they were most likely the kind that cost thousands of pounds, and no one was allowed to use it, cos it cost thousands of pounds. Now, they cost hundreds, so depending on the school you're in, they are well within the budget of single departments. So they can now feature much more widely in school curricula, and as department clubs and enrichment programs. This is exactly what this post or series of posts is aimed at, as it is way more fun if the students taking part already have an interest, and don't have to worry about the pressures of mandetory assessments and grading.
So how and where can this feature in your subject?
This is where STEAM comes in. I'm not going to go into the in's and out's of what STEAM is. That's for another post. However, I will say that it stands for Science, Technology, Engineering, Art and Mathematics, and over the last decade or so, there has been a real push for STEAM (or STEM, as it used to be called) to feature across the board, in all subjects. 3D printers are the real magic in this respect. Especially the kit ones that require self assembly. This is because they incorporate every espect of what STEAM stands for, in more ways that one, literally.
![]()
This post or series of posts will follow my journey into 3D printing enlightenment, from when I first purchased my Anet A6, and realised all the things it could do in a school setting. Please note, even though I was in the classroom, when I first got it, I no longer am. So I have not run through any of the learning in a student based setting. However, given appropriate safety precautions, everything in the posts is good to go in a secondary based environment. Although I will be referencing the 3D printer I have, which is the Anet A6, much of this will be relevant for a range of other printers.
As there is a lot to discuss on this topic, I will split it up into areas related to the 3D printer and creating things, and will highlight which of the STEAM topics are relevant. I shall discuss what's in the table below.
| Topic | Explanation | STREAM Component |
| Putting the printer together | For kit, self assembly printers | Technology, Engineering |
| The electronics and circuitry | All 3D printers require a PCB with a processor to power the printer and give commands | Technology, Engineering |
| Building an enclosure | If you want to house and protect the printer, or protect from the printer |
Engineering, Art, Mathematics |
| The material science in the raw materials | The filament for FDM (or FFF) printers can be made of PLA, ABS, TPU, Nylon and Wood to name a few, each with their own chemical properties and required printing settings | Science |
| The 3D design and creation aspects | If you are creating your own 3D model, you will need software such as Fusion 360, Blender or any other software. | Technology, Engineering, Art, Mathematics |
| The programming and related languages | Most 8bit printers use Arduino based boards, which use C programming, and the printers themselves use G Code | Technology, Mathematics |
| The settings and fine tuning of the machine | Depending on what software you use to build the code for your models, you will need to learn the settings required to get the right print results | Science, Technology, Engineering, Mathematics |
| The computing and networking aspects | For the more advanced, you may want to add raspberry pis, remote monitoring and control. | Technology |
History of 3D printing
For in indepth history of 3D printing check out this brilliant article 'History of 3D printing' by Dana Goldberg for Redshift, Autodesk's tech blog website. Also check out the 3D printing wikipedia article, with more wide ranging information. In brief,
1974: David E. H. Jones laid out the concept of 3D printing in the journal New Scientist
1981: Hideo Kodama invented the process of creating models by hardening liquid plastic by shining UV light onto it.
1984: Chuck Hull filed a patent for a stereolithography fabrication system, in which layers are added by curing photopolymers with ultraviolet light lasers. Similar to Kodama's method.
1988: S. Scott Crump developed fused deposition modeling, a special application of plastic extrusion. This technology is used by most 3D printers to date.
2005: Dr. Adrian Bowyer’s launched the RepRap Project, an open-source initiative to create a 3D printer that could basically build itself—or at least print most of its own parts.
What is the process from design to creation
As an overview of 3D printing, it may help to see how everything ties together. This will be covered in more depth throughout the posts, but very briefly from start to finish.
- Use 3D software such as Fusion 360 or Blender to create a 3D model or download a model from a website like Thingiverse. Make sure the file is in STL format.
- Use a slicer software such as CURA or Slic3r to convert the STL file to GCode, which is the code the 3D printer can read and turn into movements and settings to create your 3D model.
- Transfer the GCode file to the printer, either via SD card or via software such as Octoprint, which is connected to your printer (or the slicer software mentioned above)
- Calibrate the 3D printer making it ready to print. e.g. make sure environment is clear, for the print head to move, the print bed is clean.
- Load the Gcode file and start the print.
- Wait for the print to complete, then remove the print from the print bed.
This has been a very brief introduction to 3D printing in an education setting. Check out the other parts to find out how 3D printing and STEAM work hand in hand.
Sources
- https://commons.wikimedia.org/wiki/File:Felix_3D_Printer_-_Printing_Head.JPG
- http://theconversation.com/explainer-whats-the-difference-between-stem-and-steam-95713
- https://education.cu-portland.edu/blog/classroom-resources/evolution-of-stem-and-steam-in-the-united-states/
- https://www.independent.co.uk/student/student-life/Studies/stem-vs-steam-how-the-sciences-and-arts-are-coming-together-to-drive-innovation-a7047936.html
- https://en.wikipedia.org/wiki/3D_printing
- https://theblabber.ca/index.php/2019/05/07/steam-night-a-huge-success/